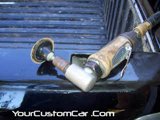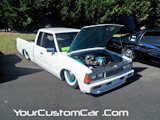
Before
|

Closer view of before shaving the stake pockets in the
company truck.
|
 Look
at those
scratches from my original plastic bed rail covers! Look
at those
scratches from my original plastic bed rail covers! |

Lets concentrate on the back left hole. The process will be the same
for the remaining holes |

Use a grinder with a 60 grit disc to remove all paint around the hole
and expose the metal for welding |

This shows the paint removed and clean metal for welding in the filler
plates |

Remove paint at least 1" around the entire hole
|

If youur truck has hidden wires for trailer hook up, be sure to pull
those out of an access hole for future use |

Place a strip of 2 inch wide masking tape over the hole in order to
make a template |

Use a pencil or crayon to runb on the tape to find your edges
|

Then use a marker to outline the edges you found with the pencil/crayon
|

I picked up a sheet of 16 gauge steel to use for the plates to shave
the holes for about 10 bucks at Lowes Home Improvement |

I purchased a 2 foot piece that was 8 inches wide. I will
have plenty to spare for future needs.
|

Peel your masking tape off of the truck and trim it to the exact size
of the stake hole. Stick the tape to the new metal, in the corner |

Using an electric or air grinder with a cut off wheel, cut the metal
out along the edge of your tape template. |

This is the metal I cut out with te tape still applied
|

Test fit your new piece in the stake hole you are shaving |

Once your sure it fits well, remove the tape
|

At first, this plate was still just a hair too big, so I continued to
grind the edges until it fit nicely
|

Remember that it does not have to be a perfect fit to shave stake holes. You will
be welding this in place and the weld will fill the gap(s) |

Happy with the way this plate fit, I used it as a template to create
the rest of the filler plates
|

Use your nice fitting filler plate as a template to trace onto the 16
ga. steel |

I traced the filler plate to make three additional outlines of the
remaing plates |

I then rough cut out the additional plates and marked each with a
"bottom" |

clean up the edges of the remaining filler plates with your
grinder/cut off wheel
|

I created an angled edge on the bottom edge of each filler plate so
that it would sit nicely in the bed stake holes. |

Now all four plates are ready to be instaled/welded in place
|

I use a Hobart welder for projects like this. This a 140 amp
model and is a great welder for the money |

I set up my welder to properly penetrate the size metal of my truck be
and filler plate steel |

Tape one of the filler plates in place over the stake hole that you are
shaving
|

The tape will hold the filler plate in place while you weld a few tacks
|

Tack weld each corner of the filler plate before removing the tape
|

Sheet metal tends to warp with the high heat from welding. I
always keep a water soaked rag to place over the weld area to cool it
down quickly. |

Continue to spot weld around the plate, but take breaks between tacks
to prevent the metal from getting too hot.
|

Tack/Spot weld around the entire plate until it is fully
welded and you have officially shave stake hole in this corner of your bed. Dont lay bead welds, ONLY TACK WELD.
|

Get your grinder back out and grind down all of the tack welds until
the panel is as smooth as possible. Don't forget that
grinding will make the metal get hot too. Keep it cool with
your water rag. |

Here you can see that all of the tack welds high spots are ground
smooth.
|

Rear view showing all of the tack weld high spots are smooth.
Also grind down any weld splatter that has landed around the welded
filler plate
|

After you clean up your weld area, sand down the paint for another
three inches beyond your filler plate. Clean it up with laquer thinner
or paint prep. Mix up some bondo and spread it evenly over
the shave stake holes area with a plastic spreader. |

To shave stake holes in the front of the bed is done the same way, but be
sure to tape some paper to your rear glass to prevent
cutting/welding fragements from scratching or breaking your
glass. A little prevention can save you some
headaches at a time like this |

I got a little sloppy on this corner with my Bondo, but it will sand
smooth without much effort.
|

By
the time the Bondo had dried enough to sand, it hads gotton dark, but
after sanding and washing, the bondo was smooth enough for another skim
coat of Bondo, then primer followed by paint.
|

I decided to have my entire bed Rhino-Lined and proceeded to clean up
the rest of the bed
|

Fortunately,
Rhino Liner has excellent fill capabilities so I didn't have to worry
asbout sanding all of the scratches smooth in my bed floor
|

All four Stake Holes Shaved Bondo'd, and sanded.
|

After having the truck bed painted, or Rhino Lined in my case, the
smooth and clean look of your bed rails with the shave stake hole swill make your truck look much
better! |

Finished view of the left bed rail
|

Bed Floor after Rhino Lining
|

Smooth Right side Bed Rail
|

Rhino Lined Tail Gate
|

My Shop Dog, Newman, has approved the work |

Reinstalled my Extang Tanneu Cover to complete the job |

Yes it is possible to have a bed cover AND an exhaust stack |

All Done with the shave steak holes project!
|


